Adding Social Content Locker in Blogger

Hi guys, today I am bringing you the most fantastic Widget which helps to increase our Blogs traffic By Sharing. It Is Called Social Content Locker which helps to share our blog to unlock the content. You may have seen related to this content locker in different surveying sites where we must share the page to view hidden text, downloads and much more.
So, lets add this special widget in our blog.

Follow My Steps to add it in your blog;

  • Open your blog account
  • Go To Blogger Dashboard
  • Select Your Blog and click On Layout
  • Click On Template and select Edit HTML 
  • Search For This Code </head>
  • paste the below code just below the code
<link href='https://drive.google.com/file/d/0B6h45U6VDP-abXFiYWZPZlVoeTA' rel='stylesheet' type='text/css'/>

  • Now, save your template
Now, let's add this in our desired post. Follow my steps to show it in our specified posts;

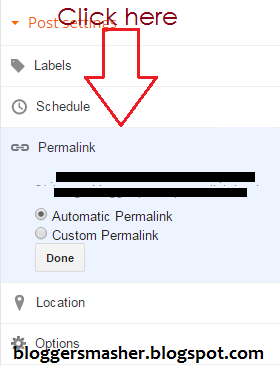
  • Click On The Blog post where you want to add this
  • Click On Edit post
  • Select HTML in place Of Compose button
  • Paste The Code There

<article id="default-usage">
<div class="to-lock" style="display: none;">
<!--Hidden Content Starts (You can Use HTML BELOW)--> <div style="text-align: center; margin-bottom: 20px;"> <img src="Add_Hidden_Image_Here" alt="" style="margin: auto;" /> </div>
Add Your Hidden Text Here
<div style="text-align: justify"> </div> <!--Hidden Content Ends (You can Use HTML ABOVE)-->
</article>
</div><div id="nbtunlocker"> </div>
<script type="text/javascript" src="https://drive.google.com/file/d/0B6h45U6VDP-acDRPeDFFeXRCRE0"></script>
<script> jQuery(document).ready(function ($) { $("#default-usage .to-lock").socialLock({ text: { message: "Yes, this is Social Locker. Just try it, click on one of buttons." header: "Share it To Unlock This Content", }, style: "ui-social-locker-secrets", buttons: { order: ["twitter", "facebook", "google"] },
url: "http://www.twitter.com/bloggersmasher",
// twitter options twitter: { text: "Upgrade your social buttons to get more social traffic!" url: "http://www.facebook.com/bloggersmasher", }, // facebook options facebook: { appId: "408184442589211" url: "bloggersmasher.blogspot.com" }, google: { } });
});;;;
</script>
  • Now, Change The Following Highlighted Lines:
Change Add_Hidden_Image_Here with Your Hidden Image
Change Add Your Hidden Text Here with your hidden Text
Change bloggersmasher with your Twitter Username
Change bloggersmasher with your Facebook page Link
Change bloggersmasher.blogspot.com with Your Google plus Username

  • At Last, publish The post
Now, we've successfully added social content locker in our blog. If You Have any kind of problems, you can comment and I shall Help You. 
Happy Blogging!!!
Regards,
Nischal Khanal

Adding Attractive Navigation Bar For Blogger


A navigation menu is highly required organize your blog labels, or to add a menu button for a new Blogger page, or to link to another page on the web. This can be done using some basic HTML and CSS. Before 2 years, our previous admin Mr. Ajaya Gajurel wrote a post on "Creating Custom Navigation Bar for Blogger". You can see it here. So, I'm not going to describe more about it. Just I will be telling you that they will work as a buttons for bloggers. When we click on any of them, it redirects to the specified URL of it.

Follow My Steps on Adding Custom Navigation Bar;

  • Go To Blogger Dashboard
  • Click On Add A Gadget Just Below Your Blogger Header (Because We will be showing it in the top of our blog)
  • Click On HTML/Javascript 
  • Paste The Below Code there;
 <div id="tabs24">  
      <ul>  
           <li><a href="1st link" title="Smasher Menu"><span>Home</span></a></li>  
           <li><a href="2nd Link" title="Smasher Menu" class="current"><span>About Us</span></a></li>  
           <li><a href="3rd link" title="Smasher Menu"><span>Services</span></a></li>  
           <li><a href="4th Link" title="Smasher Menu"><span>Our Work</span></a></li>  
           <li><a href="5th link" title="Smasher Menu"><span>Contact Us</span></a></li>  
      </ul>  
 </div>  


  • Change 1st Link, 2nd Link, 3rd Link, etc with your respective links.
  • Change Home, About Us, Services, Our Work, Contact us, etc with the text to appear in the button.
  • Save it!
Now, we have added the links. But it is incomplete and looks very very simple. Now, let's stylize the bar. Follow My Steps To Stylize the navigation bar;
  • Go To Blogger Dashboard And Select Template And Click On Edit HTML
  • Then Search for This Code inside the HTML Codes: ]]></b:skin>
  • Now Just Paste This below code before/above ]]></b:skin>
 /* ---------------------- Start Smasher Navigation Bar ---------------------- */  
 #tabs24{position:relative;height:43px;font-size:14px;text-transform:uppercase;background:#fff url("images/time4bed_bg.gif") repeat-x bottom left;font-family:Georgia, "Times New Roman", Times, serif;}  
 #tabs24 ul{margin:0;padding:0;list-style-type:none;width:auto;float:left;}  
 #tabs24 ul li{display:block;float:left;margin:0 2px;}  
 #tabs24 ul li a{display:block;float:left;color:#ffdab6;text-decoration:none;padding:0 0 0 25px;height:43px;line-height:50px;}  
 #tabs24 ul li a span{display:block;float:left;padding:0 25px 0 0;height:31px;width:auto;}  
 #tabs24 ul li a:hover{color:#fff;}  
 #tabs24 ul li a:hover span{display:block;cursor:pointer;}  
 #tabs24 ul li a.current,#tabs24 ul li a.current:hover{color:#894d12;background:transparent url("images/time2bed_left-ON.gif") no-repeat top left;}  
 #tabs24 ul li a.current span{background:transparent url("images/time2bed_right-ON.gif") no-repeat top right;height:43px;}  
 /* ---------------------- END Smasher Navigation Bar ---------------------- */  

  • Save Your Template
  • Check Your blog
Now, we have made a custom navigation bar for blogger. The final work in your blog looks similar to this;
If you guys have any problems regarding this topic, you can comment below;
Regards,

Add Beautiful E-mail Subscription Box For Blogger


Sometimes, our reliable visitors may not be able to view our blog posts. So, they'd like to subscribe via RSS.  Each of the visitor subscribed by RSS would be updated immediately after updating the site. So, it is preety much cool. Visitors will be e-mailed automatically after the update of the website.
But, many of the users have the default blogger Feedburner E-mail Subscription Box which doesn't look preety and attractive. So, in this tutorial, We've brought you guys a beautiful e-mail subscription box for blogger.
So, let's get started;

Add Stylish E-mail Subscription Box For Blogger;

  • Go To Blogger Dashboard and select your blog
  • Click On Layout And Select Add A Gadget(Recommended To Add It On Footer)
  • Then Choose HTML/Javascript
  • Paste the Below Code There;
 <div id='footer-newsletter-wrap'>   
 <div id='footer-newsletter'>   
 <h2 class='title'>Subscribe to our newsletter<span style='color:#f54000;'>.</span></h2> <span>(Get fresh updates in your inbox. Unsubscribe at anytime)</span>  
  <div class='newsletter-inner'>   
 <form action='http://feedburner.google.com/fb/a/mailverify' method='post' onsubmit='window.open("http://feedburner.google.com/fb/a/mailverify?uri=bloggersmasher", "popupwindow", "scrollbars=yes,width=550,height=520"); return true' target='popupwindow'> <table> <tr> <td width='100%'> <input class='newsletter-address' name='email' placeholder='Your Email Address' type='text'/> </td> <td> <input class='newsletter-submit' type='submit' value='Subscribe'/>   
 </td>  
 </tr>   
 </table>  
  <input name='uri' type='hidden' value='newbloggerlab'/>   
 <input name='loc' type='hidden' value='en_US'/> </form>   
 </div> </div> </div>   
 <style> .newsletter-inner { margin-top:15px; } .newsletter-inner .newsletter-address{ color:#fff !important; width:100%; font-size:16px; border:0; background-color:#2B4052; padding:20px 0px 20px 25px; border-radius: 0px; -moz-border-radius:0px; -webkit-border-radius:0px; } .newsletter-inner .newsletter-submit{ width:100%; margin:0px 0px 0px 29px; border:0; background:#a3d14f !important; color:#1E2D3A; font-size:16px; z-index:0 border-radius: 0px; -moz-border-radius:0px; -webkit-border-radius:0px; font-weight:bold; padding:20px 20px 20px 20px; } .newsletter-inner .newsletter-submit:hover{ background:#93bc47 !important; } .grid a, .grid a:visited {color:#eeeeee} .grid a:visited {text-decoration:underline} .grid a:hover {color:#cccccc} #footer-newsletter-wrap { background:#1E2D3A; margin: 0 0 0 0; padding: 50px 0 60px 0; } #footer-newsletter-wrap a { color:#66665f; } #footer-newsletter { color:#5b5b5e; width: 520px; margin: 0 auto; } #footer-newsletter h2 { margin: 0px 0 10px 0; padding: 0; border-bottom: none; font-weight: bold; text-transform: none; color: #fff; font-size: 26px; text-shadow:2px 2px #151f28; } #footer-newsletter ::-webkit-input-placeholder { color: #fff; } </style>  

  • Change Bloggesmasher with your Feedbuner URL
  • Save Your Layout
  • Done!
Now, we have successfully added stylish E-mail Subscription Box. If you have any problems, you can ask us below.
Regards,
Nischal Khanal

How To Create A Stylish Contact Form For Blogger


Visitors may need to contact the blog administrators for some reasons or for requesting something and many other reasons. Many visitor may have some difficulties in contacting the author. For an example, if the users don't mention their e-mail address or if they don't have contact form. Sometimes it becomes a great need to contact an author, and if there are no any sufficient measures for it readers may get disappointed and leave visiting the specific blog.
So, in this video tutorial, we will be discussing on creating the contact form. You guys just need to follow my easy tutorials.
So, let's get Started;

  • Go To This Link(Opens In New Tab)
  • Go Through Sign-Up
  • In it's Dashboard, you'd see many options like this;


  • Click On Contact Form Box.
  • In the form name, type the title of your contact form and click on "OK"
  • Then, you can see the layout of the form. Just make it as you like.
  • After customizing the layout, click on Continue Button
  • Select Blogger (Since We Are Using Blogger Platform)
  • Then Copy The Codes
  • Open Your Blogger Dashboard And Select Your Blog
  • Click On Page And create A New Page
  • Switch To HTML From Compose Button
  • Paste The Code and give a suitable title.
  • At last, click on publish post.
Now, we have added contact form fr our blog. If you guys have any problems, you can ask any questions.
Read Our Other Useful Posts;
Nischal Khanal(Author)

Remove Powered By Blogger Attribution From Blogger


Hello guys, It's Nischal Again and today i'm going to show you how to remove powered by blogger attribution permanently from your blog.
Before many moments, I had written a post on removing the footer credit links from blogger templates. You can read that post here
Now, in this post, we will be discussing how to remove Powered By Blogger attribution from our blogger templates.
This attribution automatically comes if you upload a custom template for blogger and it looks too ugly. So, many bloggers are complaining this gadget to be removed.
I received a mail from an author about the way to remove the powered by blogger attribution. So, I shared this trick with you guys.
Follow my easy steps to get rid of this ugly gadget.

Steps to remove this attribution;

  • Go To Blogger Dashboard
  • Click On Template
  • Click On Edit HTML
  • Click Anywhere inside and Search For This Code using CTRL + F 
  • Now, just before it, add this code;
  • <style>
    #Attribution1 {
    display: none;
    </style>
  • Save Your Template
  • You are Done
Now, you will completely get rid of that ugly attribution. If you guys have any problems, comment and I shall be helping you.

Remove Footer Credit Links From Any Blogger Templates

Hello guys, I'm back again. I was busy somewhere else due to my studies so, I couldn't post for a long... 
Umm... Never Mind. Today, we will be discussing on removing credit links from blogger. 
Most of the default blogger templates looks ugly. So, most of us use custom blogger templates but there is a problem; the template creator writes their credit links in footer of blog. This makes us to be more rude. The blog is ours but the template creator writes their name in credits. 
So today, I will reveal you the ways to remove the footer credit links from blogger. 
You can see the picture of  our blogger footer credit below;


Now, Let's Remove this ugly credit links;

  • Go To Blogger Dashboard >> Template >> Edit HTML
  • Click anywhere and Search For Designed By Using CTRL + F, If you can't find Designed By keyword, search For Template By Or similar word
  • You can see the following codes there;

  • Now, Just Before Designed By letter, copy and paste this code; <div style="visibility:hidden"> and at last, </div> after </a> like The Given Picture;

  • The Code should Be Like This;
<div style="visibility:hidden">Copyright (c) 2012 <a href="http://www.bloggingsentral.blogspot.com/" target="_blank" title="Blogger Templates">Blogging Sentral</a> by<a href="http://www.bloggingsentral.blogspot.com/" target="_blank" title="Blogger Templates"> Martin Gajurel</a></div>

  • Save The Template
  • You Are Done
If you have any queries then you can ask us via comments.
If you guys couldn't remove credits from any templates, you can send that template to;
nischalkhanal123@gmail.com

And I will remove credit links from there and will provide the template to you guys!

Happy Blogging!!!

How To Change Blogger Posts Permalink


;
Hi guys, It's me again and today we will be discussing on changing the permalink of blogger. Blogger itself has different built in facilities. And Permalink is also one of the facilities of blogger. You will be imagining what is permalink. Don't worry, I will tell you.

Permalink

Permalink, a short name of permanent link is the URL Of different webpages and websites.

In this tutorial, we will be changing permalink of blogger posts. We can change it with some easy and few steps.

Steps of changing Blogger Permalink;

  • Go o Blogger Dashboard
  • Create A New Post And Write Post Title At First
  • Write all the things that you need to write
  • Finally, navigate to post setting and click on permalink as in the below picture;

  • Click On Custom Permalink
  • Write A Unique URL that you like
  • Finally Publish The Post
  • You Are Done
Hurray, we have changed our blogger post permalink. If you guys have any problems related to this, comment and I shall help You. Stay tuned For New Blogger Tricks
Happy Blogging!!!

Add 360 Degree Rotating Effect In Any Blogger Images


Hi guys, It's Nischal Khanal, new admin of Blogger Smasher. Our previous admin Mr. Ajaya Gajurel has posted about importance of images in blogger posts before 2 years. Really, image is very important in blogosphere. The things that we cant describe can be described by images. So, Leonardo Da Vinci also considered image as a worth thousands of words.
Lets come to our point guys, today we shall be discussing how to rotate image up to 360 Degrees when we hover our mouse upon it.
For a live demo, you can hover your mouse to this below picture of Neymar Jr. When you guys hover your mouse up to it, it rotates up to 360 Degrees.
Now, let's add this effect in our blog. Follow my steps to add it in your blog;
  • Go To Blogger Dashboard
  • Select Your Blog
  • Click On Template
  • Click On Edit HTML
  • Search For This Code: ]]></b:skin> Using CTRL + F
  • Paste The Following Code Just Above ]]></b:skin>

.smasherimg {
opacity:
0.6;
border:3px solid #808080;
margin-left: 0px;
-o-transition: all 0.6s ease-out;
-moz-transition: all 0.6s ease-out;
-ms-transition: all 0.6s ease-out;
-webkit-transition: all 0.6s ease-out;
zoom: 1;
}
.smasherimg:hover {
-moz-transform:rotate(360deg);
opacity: 1;
border:
5px solid #D70E3C;
-o-transform:rotate(360deg);
transform: rotate(360deg);
-webkit-transform:rotate(360deg);
-ms-transform:rotate(360deg);
zoom: 1;
}
Customizations
  • Change #D70E3C to your desired border color
  • Change 5px to your desired border size
  • If You want to make the image totally opaque, change 0.6 To 1 in opacity 
  • Save Your Template
For Rotating Images Of Whole Blog;
Guys, if you want to make all the images to rotate of your blog, follow my steps. Or if you want to rotate only specific pictures, skip these steps
Steps to rotate all images of blogger posts;
  • Change .smasherpic with .post img
  • Save The Template

Now, the effect will be saved in your template. But, for rotating it in specific images of blogger posts, you must paste a code in every images. It isn't much hard as it sounds.
Follow my steps to rotate specific images in blogger posts;
  • Create A New post
  • Write all the informations that you need to post
  • Upload Images that you need to hover
  • Open the post editor from HTML Mode
  • Just before your image Tag, paste the following code;
<div class="rotate">
<img src="Your Image URL"/>
</div>

  • Finally publish the post
  • You Are Done
Now, when you hover the mouse over the image which you have made rotate, it will rotate up to 360 degrees. That's all guys, If you enjoyed this tutorial, be sure to share this posts. Stay tuned for different fantastic posts. Till Then, Good bye Guys!!
Happy Blogging!!!